
Free Crochet Bunny Pattern – Step-by-Step Guide
Indulge in the joy of crafting with this delightful free crochet bunny pattern! These miniature amigurumi bunnies are not only adorable, but come ready with their tiny outfits, adding an extra level of charm. What’s more, they’re a breeze to crochet, making them perfect for whipping up last-minute gifts for all the little ones in your life.
This post may contain affiliate or referral links. As an Amazon Associate, I may earn a commission from qualifying purchases.
Whether you’re a seasoned crocheter or just starting out, this pattern promises hours of fun and the satisfaction of creating something truly special. So grab your yarn and hooks, and let’s bring some handmade magic to life!
Don’t have time to make it right this instant? Pin it for later →

About the Free Crochet Bunny Pattern
To minimize the need for sewing, I’ve designed this crochet bunny pattern so that the head, arms, and body are all crocheted as one piece. This clever construction not only streamlines the assembly process but also ensures a seamless finish that’s both sturdy and visually appealing.
Feel free to experiment with different yarns, but I recommend opting for a slightly smaller crochet hook size than usual. This technique creates a tighter stitch, which prevents stuffing from peeking through and gives your bunny a more polished look.
So whether you’re a seasoned crocheter or just starting out, you’ll find this pattern both versatile and beginner-friendly, making it the perfect project for crafters of all skill levels.

Materials
- Cotton yarn: sport/4ply (size 2, fine or baby weight) in white, pink, and beige.
- Size 2.5 mm crochet hook.
- Poly-Fil Fiberfill stuffing.
- 10 mm black safety eyes.
- Embroidery floss in white, brown, black, and pink.
- Yarn needle, stitch marker, pins, and scissors.
- Optional: decoration button.
What did I use?
Schachenmayr Catania, 100% Cotton, 1.76 ounces = 137 yards/50 grams = 125 meters. Colors: 00105 (white), 00257 (beige), 00189 (pink).


Gauge and Measurements
Gauge is not important for this free crochet bunny pattern. You can easily adjust the size of your toy by using a smaller or larger hook and different types of yarn.
My finished toy measures approximately 5.9 inches (15 cm) tall, not including the ears. For those aiming for the same size, this gauge can serve as a reference: a 10-stitch by 10-row swatch in single crochet should measure 3.5 × 3.5 cm (1.38 × 1.38 inches).
Abbreviations (US terms)
Here are the crochet abbreviations used in this free crochet bunny pattern. Note that instructions are written in US terms. The resource you may find helpful in following this free crochet bunny pattern: Crochet Abbreviations.
| Abbreviation | Meaning |
|---|---|
| CH | chain |
| St/Sts | stitch/stitches |
| SL ST | slip stitch |
| SC | single crochet stitch (i.e. 3 SC means to make one SC in each of the next 3 sts) |
| DC | double crochet stitch |
| INC | single crochet increase (SC in indicated stitch 2 times) |
| TR | treble crochet stitch |
| Inv DEC | invisible decrease (single crochet two stitches together front loop only) |
| BLO | back loop only |
| (…) | total number of stitches made in current round |
If there is a record in the brackets in the pattern, multiplied by some number, for example [3 SC, 1 INC] x 3, it means you need to repeat this action 3 times, that is 3 SC, 1 INC, 3 SC, 1 INC, 3 SC, 1 INC.
PDF Pattern
The PDF crochet pattern is a great solution for those who want to print the instructions and work offline, or just want to support my work. You can find the PDF pattern in my shop.

You may also like – Crochet Toy Pattern Bundle Three in One.

Arms
Use white yarn. Crochet in a continuous spiral with a stitch marker. It can be a colored pin or thread of contrasting color. Pin a marker to 1st stitch of a round. Every new round must be started with a stitch at the marker.
R1: start 6 SC into a magic ring (6)
R2: 1 INC in all sts (12)
R3: [3 SC, 1 INC] x 3 (15)
R4-5: 1 SC in all sts (15)
R6: 5 Inv DEC, 5 SC (10)
R7: 3 SC, change color to beige in the last step of the last sc (Photo 1 and 2), 7 SC (10)

R8-15 (8 rounds): 1 SC in all sts (10)
Remove marker and stuff bottom part of the arm. Turn the detail so that the invisible decreases made in round 6 are facing you. Press both sides of the arm’s open end together so that they align (Photo 3). Before you start Round 16 crochet 2 SC more to the outer side stitch.
R16: Insert the hook through the corresponding stitches on both sides of the arm’s open end to crochet them together with 5 SC (Photo 4, the first stitch is usually hard to crochet therefore use a smaller hook for convenience).

Break the yarn and fasten off. Weave in ends. Crochet the second arm in the same way (Photos 5 and 6).

Legs
Use beige yarn. Crochet in a continuous spiral with a stitch marker.
R1: 6 SC into a magic ring (6)
R2: 1 INC in all sts (12)
R3: [1 SC, 1 INC] x 6 (18)
R4: 1 SC, 1 Inv DEC, 7 SC, 1 INC, 6 SC, remove marker, 1 Inv DEC (17)
R5: 1 Inv DEC (place marker), 7 SC, 2 INC, 6 SC (18)
R6: 1 SC in all sts (18)
R7: 1 Inv DEC, 8 SC, 1 INC, 7 SC (18)
R8: 1 SC in all sts (18)
Enlarge the loop and break the yarn. Crochet the 2nd leg, but do not break the yarn this time.

Body
Stuff while you go. Go ahead on the 2nd leg to connect both legs into a body.
R1: 1 SC, CH 4 (= CH4-chain), take the 1st leg (Photo 8), place enlarged loop back on your hook and tighten (Photo 9),

insert the hook into the next st (Photo 10), yarn over, pull up a loop (3 loops on the hook, Photo 11),

yarn over and pull the yarn through all loops on the hook, then 17 SC over the remaining sts on the 1st leg, 4 SC along the CH4-chain, 18 SC around the 2nd leg, 4 SC into the loops on the other side of the CH4-chain (44, Photo 12, 13). Next stitch will be a new beginning of the following rounds.

R2: 1 SC (this st is hard to crochet therefore use a smaller hook for convenience, place marker), 17 SC, 1 INC, 2 SC, 1 INC, 12 SC, 1 INC, 5 SC, 1 INC, 2 SC, 1 INC (49)
R3: 5 SC, 1 INC, 43 SC (50)
R4: 1 SC in all sts, change to pink yarn in the last step of the last sc (50)
R5: 1 SC, 1 INC, 16 SC, 1 INC, 6 SC, 1 INC, 16 SC, 1 INC, 7 SC (54)
R6. Work BLO: 1 SC in all sts (54), don’t forget to stuff
R7: [1 Inv DEC, 7 SC] x 6 (48)
R8-9: 1 SC in all sts (48)
R10: 3 SC, 1 Inv DEC, [6 SC, 1 Inv DEC] x 5, 3 SC (42)
R11-12: 1 SC in all sts (42)
R13: [1 Inv DEC, 5 SC] x 6 (36)
R14-15: 1 SC in all sts (36)
R16: 2 SC, 1 Inv DEC, [4 SC, 1 Inv DEC] x 5, 2 SC (30)
R17-18: 1 SC in all sts (30, Photo 14), stuff

Arms connection
For the following round, take care to attach arms symmetrically as shown on Photo 16.
R19: 4 SC (you may need a different number of sc, change to beige yarn), join the 1st arm: 5 SC (work hooking through both sts of the body and the arm, Photo 15); 10 SC BLO; join the 2nd arm: 5 SC; 6 SC BLO, remove marker; 4 SC BLO (30, Photo 16)

R20: [1 Inv DEC, 1 SC] x 10 (20)
R21: 1 SC in all sts (20), continue crocheting a head without cutting yarn
Head
R1: [1 INC, 1 SC] x 10 (30)
R2: [1 SC, 1 INC] x 15 (45)
R3: 1 SC in all sts (45)
R4: [4 SC, 1 INC] x 9 (54)
R5: [8 SC, 1 INC] x 6 (60)
R6-R17 (12 rounds): 1 SC in all sts (60)
Mark eyes with pins between round 11 and 12 with a distance of 11 stitches between pins (Photo 17). Insert safety eyes (Photo 18). Make sure you are happy with the placement before proceeding because once the washer is fixed to the rod of the eye, it cannot be removed.
R18: 4 SC, 1 Inv DEC, [8 SC, 1 Inv DEC] x 5, 4 SC (54)
R19: [1 Inv DEC, 7 SC] x 6 (48)
R20: 3 SC, 1 Inv DEC, [6 SC, 1 Inv DEC] x 5, 3 SC (42), start stuffing
R21: [1 Inv DEC, 5 SC] x 6 (36)
R22: 2 SC, 1 Inv DEC, [4 SC, 1 Inv DEC] x 5, 2 SC (30)
R23: [1 Inv DEC, 3 SC] x 6 (24)
R24: 1 SC, 1 Inv DEC, [2 SC, 1 Inv DEC] x 5, 1 SC (18)
R25: [1 Inv DEC, 1 SC] x 6 (12), stuff firmly
R26: 2 Inv DEC, close remaining stitches through the front loops as shown in the video.

Ears
Use white yarn. Make a foundation chain 17.
R1: 1 TR into 5th ch from hook, 11 TR along the chain, 10 TR into same last st, work along the other side of the foundation ch: 12 TR, CH3, SL ST in chain as shown on Photo 19 and 20,

fasten off and weave in the end (Photo 21).

R2: Insert your hook into the stitch where you crocheted the last slip stitch, beige yarn over (Photo 22), pull up a loop, CH1 and 1 SC in this st (Photo 23),

2 SC in the ch4-chain (Photo 24), 2 SC into corner st, 11 SC along the side of the ear, (1 SC, 1 INC) x 5, 11 SC along the other side of the ear, 2 SC into one st, 2 SC in the ch3-chain, SL ST into the 1st st of the rnd. Break the yarn and weave in ends.

Crochet the 2nd ear in the same way (Photo 25).
Fold ears as shown on Photo 26 and sew them together with beige yarn, then sew them to the top of the head (Photo 27)


Skirt
Use pink yarn. Crochet skirt into front loops of the remaining stitches of the body (Round 06).
Hold the toy head down, the back side is facing you, insert the hook in front loop of the 1st remaining stitch, pink yarn over (Photo 28), CH3 (Photo 29),

1 DC in the same stitch, [1 DC, CH2, 2 DC in same st, CH2] to the end of the remaining front loops, SL ST into top of CH3 (Photo 30). Fasten off and weave in ends.

Hem
Use white yarn.
Insert your hook into one st surrounded by CH2-chains (where we crocheted 1 DC in the previous round, not 2 DC), yarn over (Photo 31), pull up a loop, CH1 and 1 SC in this stitch, [CH2 (Photo 32),

2 SC (in the sts of 2 DC made in the previous rnd, Photo 33), CH2, 1 SC] x repeat to the end of the round, finish with 1 SL ST in 1st of the round. Weave in ends.

Scarf
Use white yarn. Make a foundation chain 64
R1: 3 DC into the 3rd ch from the hook, 60 DC along the chain, 7 DC into the same last ch; work along the other side of the foundation chain: 60 DC, 3 DC into the same last ch, finish with 1 SL ST (Photo 35). Weave in the end.

Embroidering
Use straight stitches and embroidery floss.
Embroider whites of the eyes with 6-strand of embroidery floss in white color, eyelashes – in black color, nose – in pink and white color, eyebrows – in brown color as shown on Photo 37. Embroider bangs as shown on Photo 38 if you like. Also you can make some color in cheeks with decorative cosmetics.

The bunny is ready! I hope you have fun. Don’t forget to share your final result on Instagram using #GorbunovaDolls hashtag. If you enjoyed this Free Crochet Bunny Pattern, subscribe for more!

Copyright
©Gorbunovadolls. All rights reserved. This free crochet bunny pattern free may not be published, resold, reproduced, shared, translated, or altered without prior permission in writing from the author. For more details, please visit the Copyright and Intellectual Property Rights.
Selling Finished Items
The design and pattern are copyrighted and may not be reproduced or redistributed for resale! You may sell finished items made from this pattern. You are welcome to make as many items as you like for personal use or charity. However, commercial reproduction of the pattern itself is strictly prohibited.
Related Posts
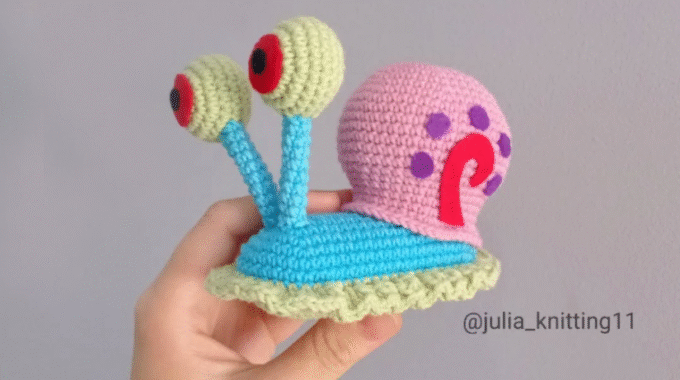
Gary the Snail Crochet Pattern – Free Amigurumi Tutorial
There’s something really fun about turning a familiar cartoon character into yarn – especially when…
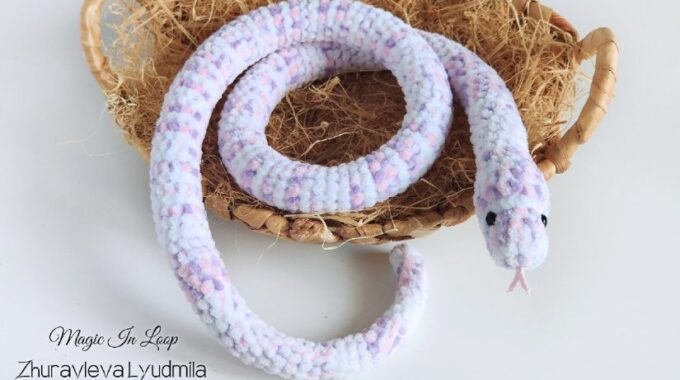
Free Crochet Snake Pattern – Easy Amigurumi Plush Toy
Meet the softest, squishiest amigurumi snake you’ll ever crochet 🐍 – long, cozy, and just…
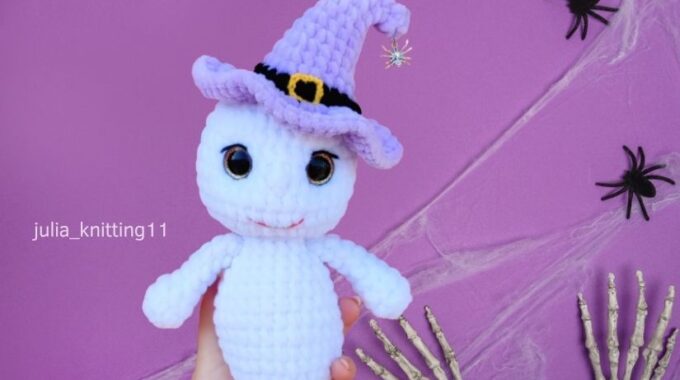
Free Crochet Ghost Pattern – Plush Amigurumi Tutorial
Halloween’s coming up fast, and if you’re in the mood for a fun and easy…
Free Crochet Keychain Pattern – Easy Amigurumi Flower Keychain
Looking for a quick and easy crochet project full of charm? This tulip 🌷 tutorial…
Comments (0)